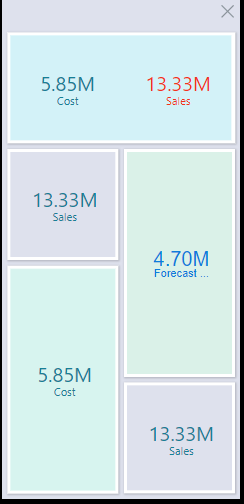
Miniature visuals may be created automatically when you scale a visual down to a size that makes it illegible. These tiles typically display the measure in the visual as a number along with its name, providing a way to easily view and interpret the most important data at a glance. Miniature visuals are particularly useful when creating mobile presentations, where they allow you to fit more visuals into a smaller space.
Enable Miniature Visuals
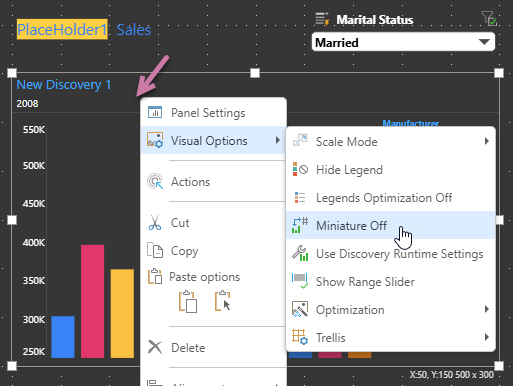
Miniature visuals are enabled by default. Any visual added to your presentation will, therefore, automatically become a miniature visual when scaled down enough in edit mode.
You can enable and disable miniature visuals using Visual Options > Miniature Off / Miniature On on the right-click context menu:
Miniature visual appearance
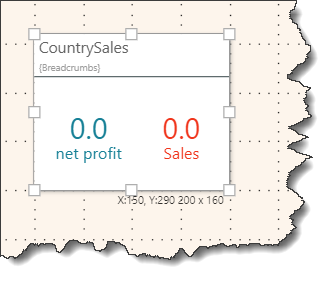
When working in edit mode, miniature visuals display a value of zero:
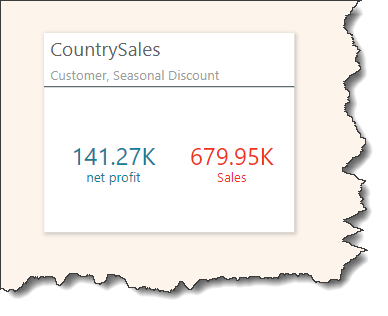
When the presentation is launched at runtime, the tile displays the visual's measure values:
Miniature visual formatting
You can set the visual panels from the Slide and Visual tabs in the ribbon, and customize panel settings from the Formatting Panel.
Text Colors
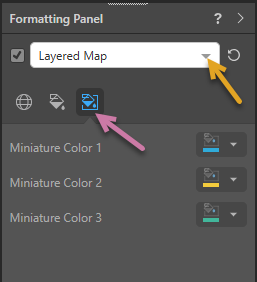
You can define the colors that should be used for the text in your Miniature Visuals in the Formatting panel for your visual. You must open the Formatting panel, select the visualization type from the menu (orange arrow below), choose Miniatures from the tabs (purple arrow) and then specify the colors you want to use:
Note: If your selected visual is saved in the Content Manager (for example, it was created in Discover and appears in multiple presentations and publications), you might need to use the right-click menu to open your visual in Discover before you can edit its formatting as described above.